






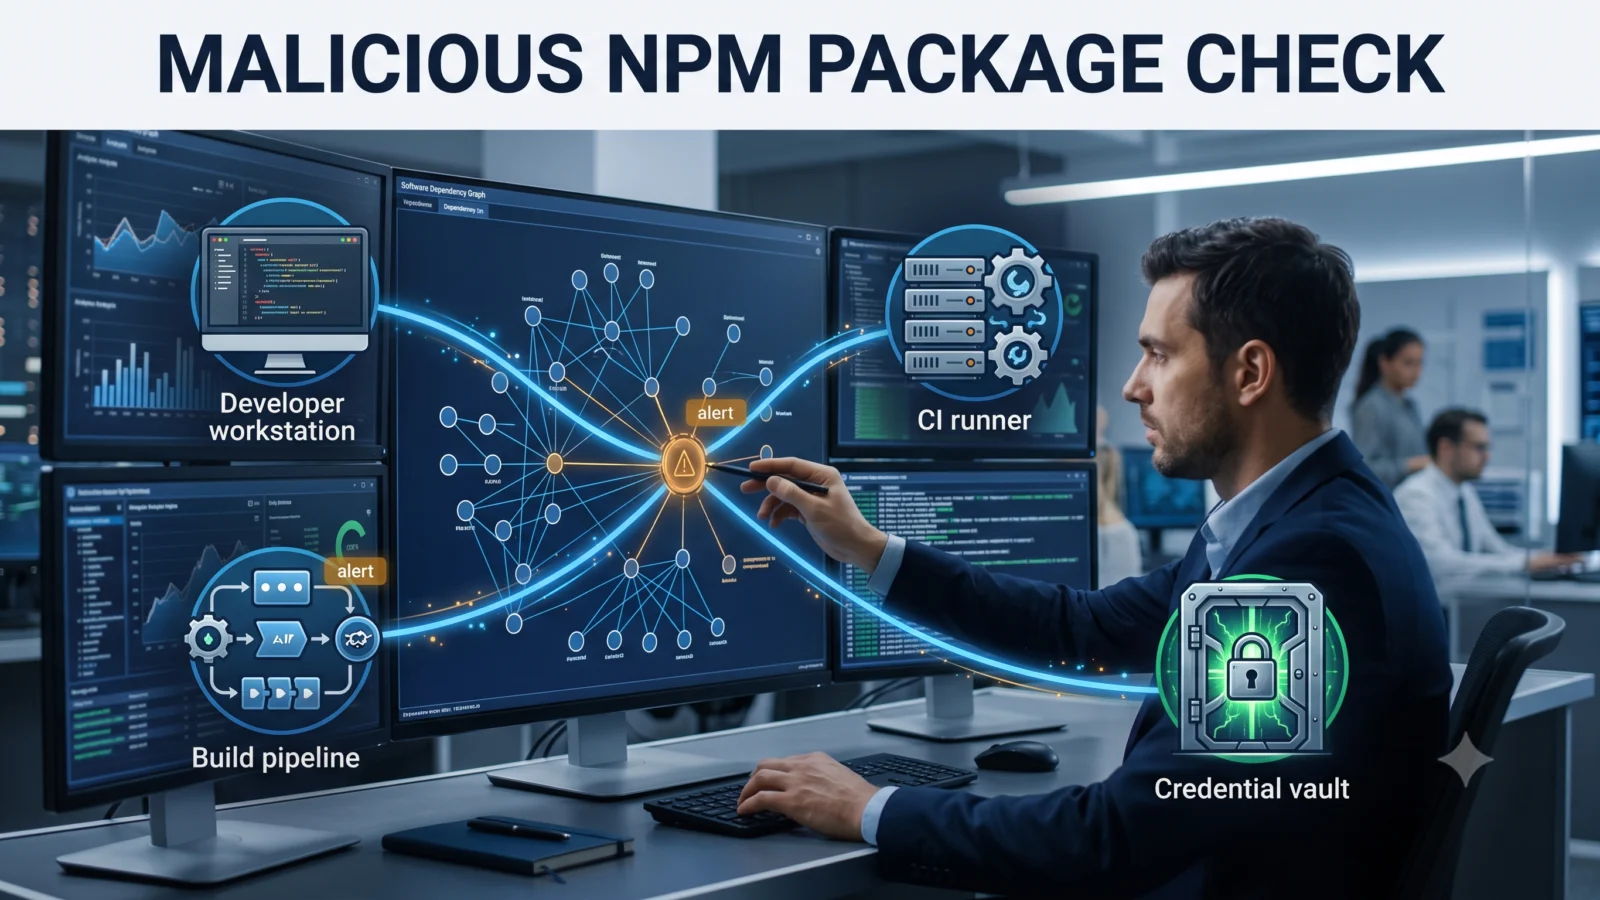
If you discover that a malicious npm package or poisoned package version was used by your project, removing it or upgrading to a clean release answers only one question: what will be installed next time. It does not tell you whether the malicious version already executed on a developer workstation, CI runner or build server, or whether credentials reachable from that environment should now be treated as exposed.
The investigation should separate four different questions: Was the affected version present? Did it execute? Which environments could it reach? What credentials, caches or build artifacts now require remediation?
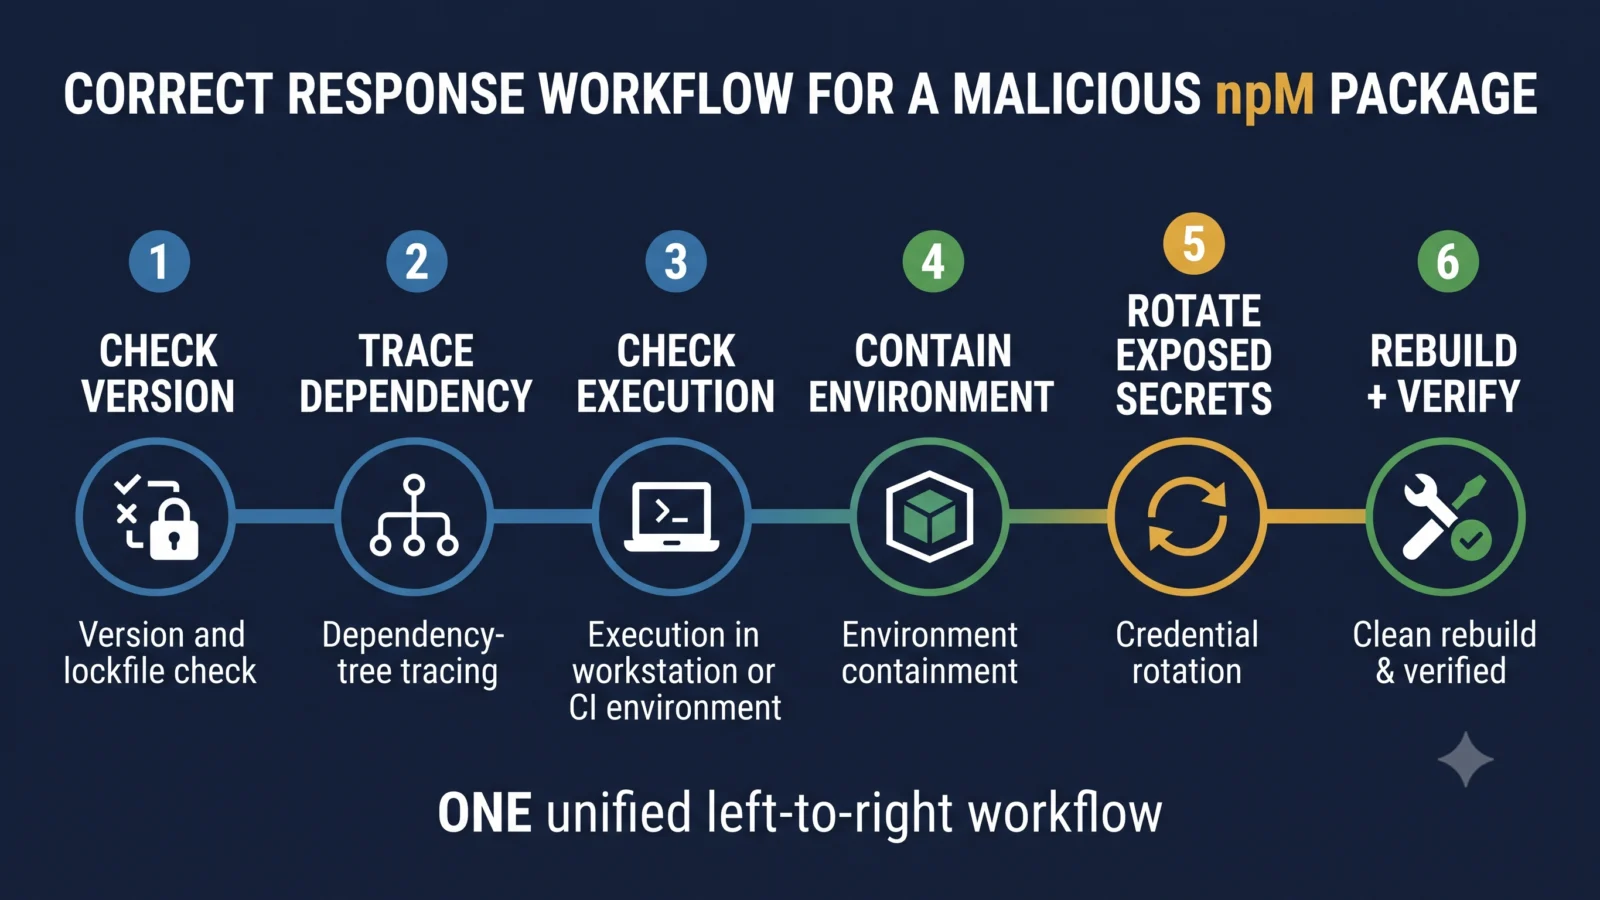
Malicious npm package response: the six-step workflow
- Confirm the exact malicious package and affected version.
- Trace it through direct and transitive dependencies.
- Determine whether the malicious code actually executed.
- Contain affected developer, CI or build environments.
- Rotate credentials that were genuinely reachable.
- Rebuild from a known-good dependency state and verify it.
The key distinction is simple: finding a malicious package is not the same as proving compromise. But deleting the package is also not proof that nothing happened earlier. The evidence has to come from the version installed, the execution path and the environment in which it ran.
1. Start with the exact malicious package version
Do not begin with the package name alone. A legitimate npm package can have one or several compromised releases while earlier or later versions remain unaffected.
From the relevant maintainer, registry, vendor, CISA or security-research advisory, record:
- the exact package name;
- the malicious version or affected version range;
- the known-good version, when confirmed;
- how the malicious code executes;
- known indicators of compromise;
- the credentials, files or services the malware is documented to target.
This determines the rest of the investigation. Recent software-supply-chain incidents have used different execution mechanisms. Some malicious releases execute during package-install lifecycle scripts, while other campaigns have delivered code that executes when the affected module is imported.
That means a project can have different exposure depending on how the specific malicious release worked. Do not copy remediation steps from an unrelated npm incident simply because both involved compromised packages.
2. Trace the package through the dependency tree
Once you know the affected version, establish whether it entered your project directly or through another dependency.
Check package-lock.json before relying on package.json
package.json normally defines acceptable dependency ranges. It may not represent the exact version installed by a particular historical build.
package-lock.json records the concrete dependency tree resolved by npm, including transitive dependencies. Search it for the affected package name and exact malicious version.
This matters because the compromised package may never appear as a direct dependency in your own package.json. Another library can pull it into the project several levels down the tree.
Use npm ls to see where the package is installed
npm ls package-name --allnpm ls helps show the installed version and the dependency paths through which the package appears in the current project.
Use npm explain to find what introduced it
npm explain package-namenpm explain approaches the dependency tree from the opposite direction. It helps identify why a package exists and which dependency caused it to be installed.
Together, the lockfile, npm ls and npm explain help answer an important question:
Was the malicious release actually part of the resolved dependency tree, and what brought it into the project?
3. Check historical exposure, not only today’s repository
A clean dependency tree today does not prove that yesterday’s build was clean.
If the project has already been updated, inspect historical evidence from the period when the malicious version was available.
Useful places to check include:
- older
package-lock.jsonrevisions; - release branches and tags;
- pull requests that changed dependencies;
- CI build logs;
- internal package-proxy records;
- artifact repository history;
- container-image build history;
- deployment records.
The goal is to reconstruct whether an affected version entered a real build or development environment before it was removed.
4. Establish whether the malicious code actually executed
Package presence and code execution are different states.
A malicious package might execute automatically during installation, or it may require the application or build process to import or invoke it. The incident-specific technical analysis should tell you which execution path matters.
Review whether any affected environment performed actions such as:
npm install
npm ci
Then determine whether the package was subsequently loaded, imported or executed by the application, build tooling or test workflow if the documented malicious behaviour depended on runtime or import-time execution.
Do not assume that “it existed in package-lock.json” automatically means credentials were stolen. Confirm the malicious version, its execution mechanism and whether the relevant code path ran in your environment.
5. Map every environment that could have executed the package
Do not limit the investigation to the developer laptop where the dependency was first noticed.
Software dependencies can pass through several environments before reaching production:
- developer workstations;
- local test environments;
- CI runners;
- build servers;
- self-hosted runners;
- container-image builders;
- internal package mirrors;
- artifact repositories;
- deployment environments.
For each environment, answer two questions:
- Did the affected version execute there?
- What credentials, files or services were accessible to that process?
This creates the boundary for the next stage of incident response.
6. Determine what credentials were actually reachable
Credential rotation should be based on evidence, not panic.
If the technical analysis of the malicious package shows that it searches environment variables, configuration files, cloud credentials, repository tokens or private keys, identify which of those were available in the affected execution environment.
Depending on the incident, that review can include:
- npm publishing tokens;
- GitHub or GitLab personal access tokens;
- CI/CD secrets;
- AWS, Azure or Google Cloud credentials;
- SSH private keys;
- package-registry credentials;
- deployment credentials;
- application API keys;
- signing credentials.
Do not automatically claim every credential on the machine was exposed. The defensible scope is the intersection of:
documented malware capability + confirmed execution environment + credentials reachable from that environment.
7. Contain the environment before rotating secrets
Rotating credentials from a machine that may still be compromised can expose the replacement credentials immediately.
If the incident analysis indicates persistence, modified developer tooling, scheduled execution, malicious hooks, altered startup behaviour or another mechanism that could survive package removal, contain the affected environment first.
Depending on the evidence, containment may involve:
- disconnecting or isolating a runner or workstation;
- removing it from deployment access;
- revoking active sessions;
- removing affected build agents;
- rebuilding the environment from a known-good image;
- performing credential rotation from a trusted system.
For a serious developer or CI compromise, a clean rebuild can provide more confidence than attempting to identify and manually delete every malicious file.
8. Clean package caches, runners and build artifacts
Deleting node_modules is not necessarily enough.
A compromised package can remain elsewhere in the software-delivery chain even after the repository itself has been corrected.
Review where applicable:
- npm caches;
- CI dependency caches;
- internal npm proxies;
- artifact repositories;
- container image layers;
- golden CI runner images;
- build workspaces;
- generated release bundles.
If an artifact was created while the malicious dependency was active, determine whether that artifact should be rebuilt from a verified dependency state.
9. Rebuild from a known-good dependency state
After removing the malicious release, establish a clean dependency baseline rather than simply running another install and assuming the problem is solved.
A practical rebuild sequence can include:
- update the affected dependency to a verified safe version;
- update and review the lockfile;
- remove affected local and CI caches where required;
- reinstall dependencies in a trusted environment;
- verify the resolved dependency tree;
- rebuild application artifacts;
- replace affected container images or deployments where necessary;
- retain the corrected lockfile under version control.
The exact steps should still follow the advisory for the specific malicious package.
10. Verify the replacement package before trusting it
Do not rely only on a version number copied from social media or an incident-news headline.
Confirm the known-good release against the package maintainer, npm registry information, repository advisory, vendor guidance or another authoritative source.
Where supported, npm also provides registry-signature and provenance checks:
npm audit signaturesThis can help validate registry signatures and provenance attestations for installed packages. It is useful as a supply-chain integrity control, but it is not a historical incident-response tool by itself.
A successful check today does not prove that a malicious version did not execute in a previous build.
11. Understand what npm audit can and cannot tell you
npm audit is primarily designed to identify known security vulnerabilities in the current dependency tree.
That is different from answering:
“Did a malicious package execute on this CI runner three days ago and steal credentials?”
For that question you need historical version evidence, build records, incident-specific indicators and environment investigation.
Use npm security tooling as part of the evidence set, not as a substitute for the investigation.
12. npm v12 reduces one important attack path
npm v12 introduced stronger install-time security defaults. Dependency lifecycle scripts are disabled by default unless explicitly allowed, and Git or remote-URL dependency sources require explicit permission.
This directly reduces risk from a class of attacks that depends on automatic lifecycle-script execution during dependency installation.
But it does not make malicious npm packages impossible.
A package could still contain harmful code that executes when imported or invoked by the application. Build tooling and other execution paths can also create exposure depending on the package and environment.
Treat npm’s stronger install controls as one defensive layer, not as proof that dependency investigation is unnecessary.
13. Reduce future npm supply-chain exposure
Once the immediate incident has been handled, address the conditions that made the compromise difficult to detect or contain.
Keep deterministic dependency records
Maintain lockfiles and review unexpected dependency changes so exact versions can be reconstructed later.
Limit what build systems can access
A CI runner that installs third-party packages should not automatically have unrestricted access to every repository, cloud environment and production secret.
Apply least privilege to build identities and separate sensitive deployment credentials from stages that do not require them.
Reduce long-lived publishing credentials
npm Trusted Publishing uses short-lived OpenID Connect credentials for supported CI/CD workflows rather than requiring long-lived npm publishing tokens.
This reduces one important credential-theft path for package maintainers.
Use provenance where it helps
Package provenance can provide additional information about how a package was built and published. It should be used as another verification signal rather than treated as a guarantee that application code itself is safe.
Review install-time script permissions
Restricting unnecessary lifecycle-script execution reduces what an untrusted dependency can do automatically during installation.
14. Know when this becomes a full security incident
A malicious dependency should move beyond an ordinary package update when evidence indicates that malicious code actually executed in an environment with meaningful privileges or sensitive information.
Examples include:
- a malicious release executing inside a privileged CI runner;
- malware documented to collect repository or cloud credentials;
- unexpected outbound connections from the affected environment;
- unauthorised repository changes;
- unexplained package publications;
- credentials used after the suspected execution time;
- unexpected persistence or configuration changes;
- affected build artifacts distributed downstream.
At that point the problem is no longer simply “a bad dependency.” It is an endpoint, identity, CI/CD or software-supply-chain security incident whose scope must be established from evidence.
A practical decision tree
If the affected version is not present in current or historical dependency evidence:
Record the check and continue monitoring the relevant advisory for scope changes.
If the affected version was present but there is no evidence the malicious execution path ran:
Remove or upgrade it, verify the dependency tree and evaluate whether further investigation is required by the incident-specific advisory.
If the malicious version executed in a low-privilege environment:
Contain and clean that environment, inspect documented indicators and assess what resources were reachable.
If it executed in CI, a privileged developer system or an environment containing sensitive credentials:
Treat the event as a security incident. Contain first, investigate exposure, rotate affected credentials from a trusted environment and rebuild relevant artifacts.
Related TPS security guides
The same principle—separating an observed vulnerability from assumptions about actual compromise—also applies to WordPress security incidents. TPS explains that distinction in its Forminator vulnerability 2026 guide.
For wider context on current cyber threats and official incident reporting, see the TPS CERT-In cyber threats 2026 explainer.
Malicious npm package FAQs
How do I know if my project installed a malicious npm package?
Take the exact affected package and version from the relevant advisory and compare it with your package-lock.json, complete dependency tree, historical lockfile revisions and CI/build records. Do not rely only on the current package.json.
What if the malicious package was only a transitive dependency?
It can still matter. A transitive dependency executes with the permissions available to the process running it. Use npm ls, npm explain and the lockfile to establish how the package entered the project and whether the affected version was installed.
Should I rotate every secret after a malicious npm package disclosure?
Not automatically. Determine what the malicious code was documented to access and what credentials were available in the environment where it executed. Rotate credentials that may genuinely have been exposed. If persistence is possible, contain or rebuild the environment before issuing replacement credentials.
Does deleting node_modules remove the compromise?
Not necessarily. Malicious code may already have executed, and affected package copies or artifacts may remain in CI caches, internal registries, container layers, runners or previously generated builds.
Does npm audit detect malicious packages?
npm audit is useful for known dependency vulnerabilities, while npm audit signatures provides registry-signature and provenance checks. Neither command by itself proves that a previously installed malicious release never executed.
Bottom line
When a malicious npm package is disclosed, the useful question is not simply whether you can update the dependency.
First determine whether the affected version entered your dependency tree. Then establish whether its malicious code executed, identify every environment that processed it and map what credentials or systems were reachable.
Only then can remediation be scoped correctly: contain compromised environments, remove affected dependencies and caches, rotate genuinely exposed credentials from a trusted system, rebuild affected artifacts and verify the clean dependency state.